

Chatbots are dying for developers; the terminal is where real AI work happens.
Gemini CLI puts Google’s Gemini models in your shell, with huge context windows and multimodal power.
But it’s not magic — vague prompts lead to the wrong stack, bloated code, or silent failures.
This guide shows the exact phrasing, flags, and templates that make Gemini CLI reliable.
You’ll learn how to control context, pick the right model options, and build reusable prompts so outputs are repeatable and useful.
Getting Started: Command Syntax and Basic Prompting for Gemini CLI

Gemini CLI is Google’s open-source command-line interface for interacting with Gemini models directly from your terminal. For developers, that means generating code, researching topics, scaffolding projects, and automating workflows without leaving your shell. It’s built for terminal-first workflows, not casual chat. With a 1,000,000-token context window and multimodal capabilities via Gemini 2.5 Pro, it’s a serious tool.
You need two things to get started: Node installed on your machine and a Google account. Install via npm with npm install -g @google/gemini-cli, then authenticate using either a GEMINI_API_KEY environment variable or by running gcloud auth application-default login if you’re in a Google Cloud environment. Google Cloud customers get additional query quotas beyond the free tier, so configure that early if you’re planning frequent or long-context prompts.
5 steps to run your first Gemini CLI prompt:
- Open your terminal and navigate to a working directory using
cd ~/code/tmp/your-project-folder. - Run the CLI with a simple inline prompt:
gemini "Explain what this directory contains". - Observe the response printed inline. Outputs appear as plain text or structured content depending on your query.
- Verify authentication worked by confirming no
Authentication failederror appears. If it does, check that yourGEMINI_API_KEYis exported or re-rungcloud auth application-default login. - Try a second prompt in the same directory to confirm the CLI reads and responds to your working environment correctly.
One behavior you need to understand from the start: the CLI is context-aware. When you run a prompt, it scans your working directory and automatically reads any GEMINI.md file found in a .gemini folder at the project root. Folder names, file structures, README contents, stray comments — all of it feeds into the model’s inference. An empty folder produces different outputs than one named my-first-flutter-app with existing code. That auto-detection is by design. But it also means your environment shapes your outputs in ways that aren’t always obvious, which becomes central to writing prompts that actually work.
Core Gemini CLI Command Flags and Options

Flags are how you customize the way Gemini CLI interprets your prompts and formats responses. Rather than relying on defaults every time, flags let you control creativity, response length, model version, and output verbosity. Precise, repeatable control across different tasks and environments.
The ones worth knowing first are --temperature, --max-tokens, --model, --verbose, and --quiet. The --temperature flag accepts a value between 0.0 and 2.0. Lower values produce more deterministic outputs, higher values introduce more creative variation. For code generation, 0.2 to 0.4 is typically the right range. Creative writing benefits from values closer to 1.0. The --max-tokens flag caps response length, preventing runaway outputs on long-context tasks. The --model flag lets you specify which Gemini version to use, such as gemini-2.5-pro. The --verbose flag enables detailed logging, useful for debugging prompt behavior and context loading. And --quiet suppresses supplementary output, leaving only the core response — ideal for scripting and pipeline integration.
Run gemini --help directly in your terminal for a complete, up-to-date list of all available flags and accepted values. It’s the authoritative reference, and it should be your first stop when something behaves unexpectedly.
| Flag | Purpose | Example Value |
|---|---|---|
| –temperature | Controls creativity and randomness of the output | 0.2 (deterministic) to 1.5 (creative) |
| –max-tokens | Caps the maximum length of the model’s response | 512, 2048, 8192 |
| –model | Specifies which Gemini model version to use | gemini-2.5-pro |
| –verbose | Enables detailed logging for debugging and diagnostics | (flag only, no value required) |
| –quiet | Suppresses supplementary output; returns response only | (flag only, no value required) |
| –stream | Enables token-by-token streaming for real-time output | (flag only, no value required) |
Writing Effective Prompts for Gemini CLI

Prompt specificity is the single biggest factor separating useful outputs from frustrating ones. Write a vague prompt and the CLI fills the gaps using system defaults, folder context, and whatever patterns the model considers most likely. Results that are technically correct but functionally wrong for what you actually needed. A prompt like “Create a web app that shows a greeting” produces plain HTML, CSS, and JavaScript in an empty folder. Change it to “Create a single page app that shows a greeting” and you can get React, TypeScript, and Bootstrap — a completely different stack, from two words.
Four components eliminate most of that ambiguity: the task, the desired output format, the constraints, and any relevant examples. A well-structured code generation prompt looks like this: “Generate a Node.js REST API using Express that serves a random 3-letter acronym as JSON, with a single GET endpoint at /acronym, and no authentication required.” Every clause adds precision. The language, the framework, the output format, the endpoint path, what to exclude. The model has no meaningful defaults to fall back on because nothing is left implied.
Common pitfalls follow predictable patterns. Ambiguous language like “make it better” or “add some features” gives the model creative latitude you probably don’t want. Missing context, like not specifying a programming language in a polyglot repository, forces the CLI to guess based on folder contents. Over-relying on implicit assumptions, such as expecting the model to know you’re building for mobile because your folder is named my-first-flutter-app, produces non-deterministic results. Sometimes it picks Flutter, sometimes it doesn’t, depending on temperature and sampling. None of that is a model failure. It’s a prompt failure.
The most reliable formula for consistent outputs is: action verb + subject + format + constraints. Applied directly: “Generate [a TypeScript function] that [parses ISO date strings and returns day-of-week] using [the date-fns library] with [no external API calls and JSDoc comments on every exported function].” This structure works across code generation, summarization, data transformation, and debugging. It scales from one-line prompts to complex multi-requirement specifications without requiring a different mental model.
Prompt Templates and Reusable Snippets for Gemini Terminal

Repeating the same prompt structure from memory across projects wastes time and introduces inconsistency. Templates fix that by encoding your preferred prompt formula into reusable shell variables or functions you can invoke with a single command. Every summarization request, code generation call, or debugging session starts from the same well-structured baseline.
The simplest implementation stores a template as a bash variable: SUMMARIZE_TEMPLATE="Summarize the following text in three bullet points, using plain language and no jargon:" followed by gemini "$SUMMARIZE_TEMPLATE $INPUT". For templates with multiple variables, bash functions let you interpolate values inline. Something like function gcode() { gemini "Generate a $1 function in $2 that $3. Include inline comments and error handling."; } turns a three-argument call into a structured, repeatable code generation request.
Common template types worth building into your library:
- Summarization — condenses long documents or output logs into concise bullet points, configurable by audience and length.
- Question answering — frames a knowledge retrieval task with explicit source constraints, such as “answer only from the provided text, do not infer.”
- Code generation — parameterized by language, framework, function purpose, and constraints like test coverage or error handling requirements.
- Debugging — accepts an error message and code snippet as inputs and requests a root cause analysis with a fix.
- Data conversion — transforms structured data between formats, such as CSV to JSON or XML to YAML, with explicit schema instructions.
- Multi-turn clarification — opens with a problem statement and asks the model to request any missing information before generating a solution.
Store these in a single sourced script file such as ~/.gemini_templates.sh and add source ~/.gemini_templates.sh to your .bashrc or .zshrc. Every function becomes available in every terminal session. Sharing the file with a teammate instantly gives them the same prompt baseline, reducing variability in AI-assisted outputs across a project.
System Prompts and Context Control in Gemini CLI
System prompts define the operating rules, persona, and workflow mechanics that govern every interaction in a Gemini CLI session. Where a regular prompt asks the model to do something specific, a system prompt tells the model who it is, what constraints it operates under, and how to approach all tasks. It’s the most powerful lever for shaping consistent, predictable CLI behavior across an entire project or organization.
The CLI reads system instructions from GEMINI.md files at two levels. The global file lives at ~/.gemini/GEMINI.md and applies universal rules across every project — useful for persona definitions, general coding style preferences, and organization-wide constraints. The project-level file lives at ./.gemini/GEMINI.md within your repository and loads after the global file, allowing project-specific overrides like framework requirements, repository conventions, and task-specific workflows. A global rule like “always explain destructive operations before executing” gets inherited everywhere, while a project-level rule like “use Express for all Node.js APIs” only applies within that repository.
For complete control, the GEMINI_SYSTEM_MD environment variable enables a full override of the CLI’s core system prompt. Setting export GEMINI_SYSTEM_MD=true or export GEMINI_SYSTEM_MD=1 tells the CLI to load a file named system.md from the .gemini directory at the project root. Setting it to any other string, for example export GEMINI_SYSTEM_MD=/absolute/path/to/custom-system.md, treats that string as an absolute path to a custom markdown file. Critically, this doesn’t amend the default system prompt. It completely replaces it. Any mandatory instructions from the core prompt that you want to preserve must be explicitly copied into your custom file before enabling the override.
When a custom system prompt is active, the CLI displays a footer icon showing |⌐■_■|. That’s your visual confirmation you’re running with a non-default configuration. If you expect it and don’t see it, the override isn’t active. Check that GEMINI_SYSTEM_MD is exported in the current shell session and that the target file exists at the specified path.
The CLI’s context window supports approximately 1,000,000 tokens, large enough to hold entire codebases. But that doesn’t mean you should feed it everything. Irrelevant files dilute the model’s attention, inflate token usage, and can introduce context contamination where stray comments or README content bias output in unexpected ways. Use a .geminiignore file to exclude directories like node_modules, build artifacts, log files, and large media assets. Treat the context window as a curated input, not an open firehose. It’s one of the most effective ways to improve response relevance and reduce unpredictable behavior.
Few-Shot and Zero-Shot Prompting on the Command Line
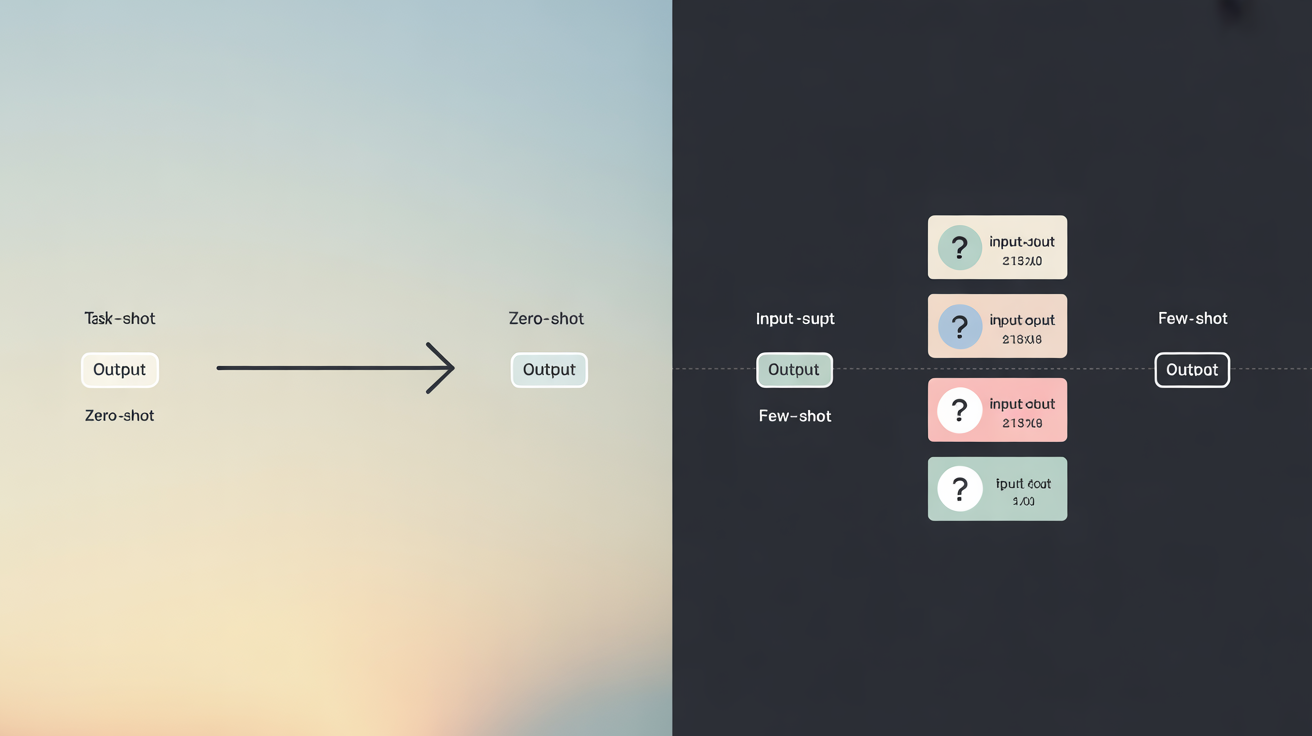
Zero-shot prompting gives the model a task description and clear instructions, relying on its pre-trained knowledge to generate an appropriate response without any examples. Few-shot prompting extends that by including two or three input-output example pairs inline within the prompt itself, showing the model exactly what format and reasoning pattern you expect before presenting the actual input you want processed.
Zero-shot works well for straightforward, well-defined tasks where the expected output format is standard. Generating a function signature, explaining an error message, converting a data structure between common formats. Few-shot becomes valuable when the task is domain-specific, the output format is non-standard, or when zero-shot attempts consistently miss the mark in a particular way. Generating custom JSON schemas, classifying text according to internal taxonomy, transforming data into a proprietary format — providing two or three labeled examples inline dramatically improves accuracy and format consistency in those cases.
4 steps to construct a few-shot prompt in the terminal:
- State the task clearly at the top of the prompt, for example: “Classify the following customer feedback as Positive, Negative, or Neutral.”
- Provide 2 to 3 example input-output pairs using a consistent delimiter format: “Input: ‘Great product, fast shipping.’ Output: Positive.”
- Add the actual input you want classified using the same format: “Input: ‘The packaging was damaged but the item works fine.’ Output:”.
- Request the model to complete the pattern in the same format, without additional explanation, to keep output clean for downstream parsing.
Once you have a working few-shot template, test it against edge cases that previously produced incorrect results and adjust your example pairs to cover those failure modes. The goal isn’t more examples. Three well-chosen pairs typically outperform six poorly selected ones. What matters is that your examples clearly demonstrate the boundary conditions of your classification or transformation task.
Code Generation and Debugging Prompts for Gemini CLI
Code generation works best when prompts are explicit about language, framework, and library requirements. The CLI will generate functional code from a vague prompt, but it’ll make those decisions itself, and the results reflect system defaults and context inference rather than your actual requirements. Always state the stack upfront. “Generate a Python Flask API” and “Generate a Node.js Express API” produce entirely different outputs. “Generate an API” in an empty folder produces whichever the model defaults to on that particular run.
Your working directory has a measurable effect on those decisions too. A generic prompt in a completely empty folder consistently produces the simplest possible implementation, typically plain HTML, CSS, and JavaScript for frontend tasks. Change the wording to include “single page app” and the output shifts to React, TypeScript, and Bootstrap regardless of whether those technologies are appropriate. Rename a folder to my-first-flutter-app and the CLI sometimes selects Flutter as the target framework even when the prompt makes no mention of it. That behavior is non-deterministic. A folder named quizzz prompted with “Create a simple full stack demo app showcase” produced a quiz application, with the model inferring the intended purpose entirely from the folder name. Context contamination is real.
Debugging prompts follow a reliable three-part structure: include the full error message exactly as it appears, paste the relevant code snippet (not the entire file unless context is essential), and describe the gap between expected and actual behavior. Something like “Expected the function to return an array of strings, but it’s returning undefined when the input array is empty.” That structure gives the model what it needs without requiring it to infer what went wrong from incomplete context.
Iterative refinement is the most practical workflow for complex code generation. Generate an initial implementation, run it, observe what breaks, then follow up with a correction prompt that references the specific failure. “The API endpoint returns a 500 error when the request body is missing the name field. Add input validation that returns a 400 with a descriptive error message.” Each follow-up builds on the previous state rather than regenerating from scratch. Faster, and more targeted.
Configuring Environment Variables and Defaults for Gemini CLI

Environment variables and configuration files are what transform Gemini CLI from a per-command tool into a consistent, personalized development environment. Encode your preferences once and the CLI applies them automatically, reducing repetitive setup and ensuring every session starts from the same baseline.
GEMINI_SYSTEM_MD is the most impactful environment variable for prompt behavior. Setting it to true or 1 tells the CLI to load .gemini/system.md from the project root as the system prompt, replacing the default core instructions. Setting it to an absolute file path, for example export GEMINI_SYSTEM_MD=/home/user/.gemini/system.md, points the CLI at a specific file anywhere on the filesystem, enabling a shared custom prompt across multiple projects.
Model defaults and agent tool toggles live in ~/.gemini/settings.json. This JSON configuration file accepts a default model name, enables or disables specific agent tools such as run_shell_command, and stores other session preferences. Setting your preferred model version here means you never need to pass --model gemini-2.5-pro on every command. Enabling run_shell_command in this file is what unlocks agent capabilities, allowing the CLI to install dependencies, run scripts, and execute multi-step shell operations as part of a single prompt session.
Shell aliases simplify common invocation patterns. On macOS and Linux, adding alias gm="gemini" to your .bashrc or .zshrc means typing gm "your prompt" instead of the full command. On Windows, the PowerShell equivalent is Set-Alias gm gemini. For environment variable setup, export syntax applies on macOS and Linux. Windows uses setx GEMINI_API_KEY "your-key" for persistent variables or $env:GEMINI_API_KEY="your-key" for session-scoped ones.
| Variable/File | Purpose | Example |
|---|---|---|
| GEMINI_SYSTEM_MD | Overrides the default core system prompt with a custom file | export GEMINI_SYSTEM_MD=true |
| ~/.gemini/settings.json | Sets default model, enables agent tools, stores session preferences | {“model”: “gemini-2.5-pro”, “tools”: {“run_shell_command”: true}} |
| GEMINI_API_KEY | Authenticates CLI requests to the Gemini API | export GEMINI_API_KEY=AIza… |
| Shell alias | Creates a shortcut command for frequent CLI invocations | alias gm=”gemini” in .bashrc/.zshrc |
| Default model setting | Eliminates the need to pass –model on every command | {“defaultModel”: “gemini-2.5-pro”} in settings.json |
Streaming Responses and Output Formatting in Gemini CLI

Streaming mode delivers the model’s response token-by-token as it’s generated, printing output to your terminal in real time rather than waiting for the complete response before displaying anything. Full response mode waits until generation finishes, then returns everything at once. Streaming is preferable for long-running prompts where you want to monitor progress, catch early errors, or avoid staring at a blank terminal. Full response mode is better when you need clean output to pipe directly into another command without partial-write race conditions.
JSON output mode, enabled via a format flag, wraps the model’s response in a structured JSON object that can be consumed programmatically. From there, standard shell tools take over. A command like gemini "Summarize this file" --format=json | jq '.response' extracts just the response text, while jq '.candidates[0].content' accesses nested fields depending on the response schema. No custom parsing logic required.
Common output processing tasks that benefit from JSON formatting and pipeline integration:
- Extracting specific fields — use
jqto pull only the generated text, token count, or finish reason from a structured response. - Filtering results — apply
jqconditions to return only responses that meet a confidence threshold or contain a specific value. - Chaining with other CLI tools — pipe JSON output to
grep,awk, orsedfor additional transformation before consuming downstream. - Logging to files — redirect formatted output with
>> response_log.jsonlto build a structured audit trail of CLI interactions. - Piping to downstream scripts — pass processed output directly to a Python or Node script for further analysis or storage.
For batch processing, newline-delimited JSON is the most reliable format. Each line is a complete, independently parseable JSON object, meaning a script can process records one at a time without loading the entire output into memory. When working with streamed newline-delimited JSON output in scripts, always buffer complete lines before parsing. Reading mid-stream from an incomplete JSON object causes parse failures that are difficult to reproduce and debug.
Prompt Chaining and Multi-Step Workflows in Gemini CLI

Prompt chaining connects a sequence of CLI calls so the output of one prompt becomes the structured input to the next. Multi-step data transformation, iterative refinement, complex task decomposition — all within a single shell script. Rather than manually copying output between terminal windows, chaining automates the handoff.
The simplest implementation captures CLI output in a bash variable and injects it into a follow-up prompt: RESULT=$(gemini "Extract all action items from the following meeting notes: $NOTES") followed by gemini "Prioritize these action items by urgency and assign owners from this team list: $RESULT. Team: Alice (backend), Bob (frontend), Carol (DevOps)." Each prompt receives clean, structured input from the previous step. The final output reflects the cumulative transformation across all steps. This pattern works for tasks as simple as summarize-then-translate and as complex as analyze-plan-scaffold-test sequences.
Batch processing extends chaining to handle multiple inputs in a loop. A for loop over a directory of files can call the CLI on each one, aggregate results into a running output file, and apply rate limiting with sleep between calls to avoid exceeding API quotas. For example: for file in ./reports/*.txt; do gemini "Summarize: $(cat $file)" >> summaries.txt; sleep 2; done. At higher volumes, consider exponential backoff. Start with a 2-second delay, double on rate-limit errors, cap at 60 seconds. Handles burst limits gracefully without manual intervention.
CI/CD pipelines are one of the highest-value applications for prompt chaining. A build pipeline can invoke Gemini CLI to perform automated code review on every pull request diff, generate updated documentation from changed source files, synthesize test cases for new functions, or audit dependency changes for security implications. These tasks are well-suited to non-interactive, headless execution using the --quiet flag and structured JSON output for downstream parsing, integrating AI-assisted analysis directly into the merge gate without requiring developer intervention on each run.
Token Management and Optimization for Gemini CLI Prompts
Tokens are the fundamental units of text the model processes — roughly four characters per token in English, meaning a 1,000-word document consumes approximately 1,300 tokens. Gemini CLI supports a context window of approximately 1,000,000 tokens, large enough to load entire codebases. But larger contexts increase latency and, in paid tiers, cost. Optimization matters even when you’re well within the limit. A focused, relevant context consistently produces more accurate and actionable responses than an oversaturated one.
The --max-tokens flag caps the length of the model’s response, preventing the CLI from generating multi-thousand-token outputs for tasks that only need a few sentences. For debugging prompts, 512 tokens is typically sufficient. For code generation, 2,048 to 8,192 is a more practical ceiling depending on output complexity. The .geminiignore file handles the input side by excluding files and directories from context loading entirely. Adding node_modules/, dist/, and *.log removes directories that can contain tens of thousands of tokens of irrelevant content the model would otherwise process on every invocation.
5 techniques for minimizing token usage in Gemini CLI prompts:
- Write concise prompts. Every unnecessary word consumes tokens and adds noise. State requirements once, clearly.
- Exclude boilerplate files. Use
.geminiignoreto prevent build artifacts, dependency folders, and generated files from loading into context. - Summarize long inputs before passing them. If a source document is hundreds of pages, summarize it with a prior CLI call and use the summary as input to your main prompt.
- Use file references instead of full text. Reference a specific function or class by name and ask the CLI to locate it, rather than pasting entire file contents inline.
- Split large tasks into smaller, sequential prompts. Two focused prompts typically use fewer total tokens and produce more accurate results than one overloaded prompt.
Monitoring token consumption is straightforward. The --verbose flag logs context size and generation details per run, giving you a concrete baseline to compare before and after optimization changes. Redirect verbose output to a log file during testing with gemini "prompt" --verbose 2>> token_log.txt to build a historical record of token usage across different prompt formulations and identify which patterns are most efficient for your specific workloads.
Interactive REPL and Multi-Turn Sessions in Gemini CLI
REPL mode transforms Gemini CLI from a single-shot command tool into a conversational session where each exchange builds on what came before. Rather than constructing one perfect prompt, you start with a rough direction and refine iteratively. Ask follow-up questions, correct misunderstandings, add requirements as the conversation develops. Context is preserved across turns within the session, so you don’t need to repeat background information or re-establish the task with each message.
Starting an interactive session is as simple as invoking the CLI without a prompt argument. Running gemini or gemini repl drops you into an interactive interface where you type prompts sequentially and receive responses in the same terminal window. The slash command menu, accessible by typing / during a session, provides access to session management features: resuming previous chats, configuring the editor, loading context files like GEMINI.md, changing the output theme, and enabling or disabling tools like web search and shell command execution.
The most productive use cases for REPL mode are those where requirements are ambiguous or evolving. Exploratory coding sessions benefit from the ability to ask “what would be a good architecture for this?” and then follow up with “show me the folder structure” and then “generate the main entry point,” each turn informed by the previous response without rebuilding context from scratch. Iterative debugging works the same way. Paste an error, receive a diagnosis, apply the fix, paste the new error, continue until the issue resolves. Requirement clarification sessions are also well-suited to REPL mode. Present a problem statement, let the model ask clarifying questions, answer them in subsequent turns, then request the final implementation once requirements are fully established.
Error Handling and Troubleshooting Gemini CLI Prompts
Gemini CLI errors fall into four broad categories: authentication failures that prevent the CLI from connecting to the API, prompt syntax issues caused by unescaped characters or malformed input strings, context overload where the combined prompt and context files exceed processing limits or introduce conflicting instructions, and network-level failures such as timeouts or connectivity drops. Recognizing which category an error belongs to immediately narrows the diagnostic path and avoids time spent investigating the wrong layer of the stack.
Authentication errors are the most common failure mode for new users and those rotating credentials. If you see “Authentication failed” or “Unauthorized,” verify that GEMINI_API_KEY is exported in the current shell session by running echo $GEMINI_API_KEY. If you’re using gcloud authentication, run gcloud auth application-default login to refresh credentials and gcloud auth application-default print-access-token to verify they’re valid. Credential files can also become stale after permission changes. Re-authenticating from scratch resolves most cases that simple token refreshes don’t fix.
Syntax errors typically come from unescaped quotes or special characters in prompt strings. A prompt like gemini "She said "hello" to him" will fail because the inner quotes terminate the string early. Escape them as \" or switch to single quotes for the outer wrapper. Shell expansion characters like $, !, and backticks inside double-quoted strings get interpreted by the shell before the CLI receives them. Either escape them with backslashes or wrap the entire prompt in single quotes. Running gemini --verbose "your prompt" surfaces detailed error messages that identify the exact point of failure.
Common errors and their fixes:
- Authentication failed — re-export
GEMINI_API_KEYor re-rungcloud auth application-default loginto refresh credentials. - Invalid prompt syntax — escape inner quotes with
\", avoid unescaped shell expansion characters, and validate prompt strings before invoking. - Context too large — add irrelevant directories like
node_modulesanddistto.geminiignoreand reduce the number of files in the working directory. - Rate limit exceeded — implement a retry loop with exponential backoff. Wait at least 60 seconds before retrying after a 429 response.
- Model not found — verify the model name with
gemini --helpor the official documentation. Check for typos and confirm the model is available in your region. - Network timeout — check internet connectivity and firewall rules. If you’re behind a proxy, confirm it’s configured in your shell environment.
When debugging persistently misbehaving prompts, redirect verbose output to a log file with gemini "your prompt" --verbose 2>> debug.log and review the log after the run. This captures context loading details, token counts, and any warnings the CLI emits during execution, providing a complete record of what the CLI actually processed, which is often different from what you assumed it received.
Advanced Prompting: Agent Tools and Shell Command Execution
Agent tools extend Gemini CLI beyond text generation into active execution. The CLI can run shell commands, install dependencies, write files, start servers, and perform multi-step automated tasks within a single session. It goes from an assistant that suggests actions to one that carries them out — practical for scaffolding entire projects, running iterative build-test-fix loops, and executing deployment workflows without switching between tools.
Enabling agent tools requires editing ~/.gemini/settings.json to activate specific capabilities. The most powerful single tool to enable is run_shell_command, which grants the CLI permission to execute arbitrary shell commands on your machine. A settings file entry looks like {"tools": {"run_shell_command": true}}. Once enabled, the CLI prompts for permission before each shell execution by default, presenting options to allow once, allow always, or cancel. Explicit control over what runs on your system during interactive sessions.
Agent Yolo Mode, enabled via the --yolo flag, removes the per-action permission prompts and lets the CLI execute a full multi-step workflow autonomously without pausing for approval. Useful for well-defined, repeatable tasks like “install all dependencies, run the test suite, and report failures” where manual confirmation at each step adds no real value. The critical caveat is that Agent Yolo Mode can produce irreversible changes — overwritten files, executed deployments, deleted directories — without a checkpoint to review. Running git init and committing your current state before entering Yolo Mode means any unintended change can be identified via git diff and rolled back with git checkout or git stash.
The most compelling use cases for agent tools in practice are automated dependency management, CI/CD script invocation, and iterative debugging loops. A single prompt like “Install the missing dependencies, run the linter, fix any auto-fixable issues, run the tests, and summarize what failed” can execute an entire quality check cycle that would otherwise require four separate terminal commands and manual review between each step. Data pipeline execution, where the CLI generates a transformation script, runs it against sample data, inspects the output, and iterates until the schema matches the target, demonstrates how agent tools compress hours of manual iteration into minutes of supervised automation.
Integrating Gemini CLI with VS Code and External Tools
The most effective developer workflow combines Gemini CLI for project-level planning and context-aware generation with VS Code Gemini Code Assist for inline, file-level editing. Sometimes called the Dual Power Strategy. CLI handles tasks that benefit from whole-project context: architecture decisions, multi-file scaffolding, CI/CD configuration, and research prompts that reference local files alongside web search. VS Code Assist handles the in-the-moment work: completing functions, refactoring blocks, explaining selected code, generating tests for the file currently open in the editor.
The key to making this combination coherent is sharing the same persona and project context between the CLI and the IDE. Paste your GEMINI.md persona statement into VS Code by navigating to Extensions, selecting Gemini Code Assist, and entering the content in the “Geminicodeassist: Rules” settings field. This injects the same behavioral instructions — preferred frameworks, coding style, naming conventions, required explanations for destructive operations — into both tools simultaneously. Responses from the CLI and the IDE then reflect the same working assumptions about your project.
Invoking Gemini CLI programmatically from scripts enables integration into larger automated workflows. In Python, subprocess.run(["gemini", "your prompt"], capture_output=True, text=True) captures the response as a string for further processing. In Node.js, child_process.execSync("gemini 'your prompt'") provides the same capability synchronously. Bash pipelines combine CLI calls with standard Unix tools directly. cat report.txt | gemini "Summarize this into five action items" feeds file content into the model without manual copy-paste. These integration patterns make Gemini CLI a composable building block in automation systems rather than a standalone interactive tool.
MCP (Model Context Protocol) extensions expand CLI capabilities by connecting to external services and development tools. Extensions for Chrome DevTools, Figma, and Postman allow the CLI to inspect browser state, read design specifications, and interact with API collections, bringing those data sources into the model’s context without manual export steps. MCP servers can be added using gemini mcp add followed by the server configuration, making capability extension a configuration task rather than a development one.
Context Filtering with .geminiignore for Efficient Prompting
The .geminiignore file tells Gemini CLI which files and directories to exclude from context loading, using the same pattern syntax as .gitignore and .dockerignore. Without it, the CLI loads everything in the working directory into context, including build artifacts, dependency folders, and generated files that contain thousands of tokens of content irrelevant to your prompt. Adding a .geminiignore file to your project is one of the fastest ways to improve both the relevance of CLI responses and the efficiency of your token usage.
The ignore system operates on two tiers. The global file at ~/.gemini/.geminiignore applies universal exclusions across every project on your machine. Patterns added here never need to be repeated in individual repositories. The project-level .geminiignore at the repository root adds project-specific exclusions that override or extend the global rules, using identical .gitignore pattern syntax. node_modules/ excludes that directory, *.log excludes all log files, and dist/** excludes all files within a build output directory.
Common exclusions worth adding to every project’s .geminiignore:
node_modules/— JavaScript dependency trees can contain hundreds of thousands of files and millions of tokens.dist/andout/— compiled build output duplicates source content and adds no diagnostic value.*.logandlogs/— runtime log files add noise and may contain sensitive data.- Large media files like
*.mp4,*.png, and*.pdf— binary and media files consume significant context budget with no textual value. - Third-party vendor directories like
vendor/andthird_party/— external dependency source code the model doesn’t need to read to assist with your project.
Maintaining a well-configured .geminiignore preserves the full 1,000,000-token context budget for the files that actually matter: your source code, configuration files, and documentation. It reduces context noise that can cause the model to generate responses influenced by dependency code rather than your own, and it meaningfully reduces the time the CLI spends loading and processing context before generating a response.
Security and Compliance Best Practices for Gemini CLI Prompts
Prompts sent via Gemini CLI can inadvertently expose sensitive information. API keys hardcoded in scripts, personally identifiable information in documents passed via @file references, proprietary business logic included as context, or authentication credentials stored in README files that the CLI loads automatically. CLI session logs compound this risk. If verbose output or response logs are stored in unsecured locations, every prompt and its associated context becomes a potential data exposure point.
The most effective mitigation is a consistent separation between secrets and prompt content. Store API keys and credentials exclusively in environment variables. export GEMINI_API_KEY=your-key rather than embedding them in prompt strings or configuration files the CLI might read. Before passing files into context with @filename references, review their contents for personally identifiable information fields, token values, or proprietary data and redact or anonymize as needed. In automated scripts, validate prompt inputs programmatically by stripping or masking patterns that match credential formats like sk- or AIza before the string reaches the CLI invocation.
Secure CLI usage practices worth implementing immediately:
- Rotate
GEMINI_API_KEYand any associated credentials on a regular schedule, and revoke compromised keys through the Google Cloud console immediately upon detection. - Restrict access to CLI session logs and verbose output files. Store them in directories with permissions set to the running user only using
chmod 600 log_file. - Add sensitive file patterns like
.env,*.pem, andsecrets/to both.geminiignoreand.gitignoreto prevent them from loading into CLI context or being committed to version control. - Anonymize or replace real user data with synthetic equivalents before including data samples in prompts. Use placeholder values that preserve the structure of the data without exposing actual personally identifiable information.
Compliance requirements in regulated environments typically mandate that every AI-assisted interaction is auditable. Logging prompt and response pairs to a structured newline-delimited JSON file, one record per line with timestamp, prompt hash, model version, and response, creates an audit trail that can be reviewed against acceptable use policies. Ensure log storage meets the data residency and retention requirements of your organization before enabling persistent logging, and confirm with your security team whether prompts containing code or documentation require the same handling as other intellectual property.
Final Words
From basic syntax and authentication to agent tools, prompt chaining, and VS Code integration, mastering how to prompt for Gemini CLI opens up a genuinely powerful development workflow.
The techniques covered here — few-shot examples, reusable templates, system prompt overrides, and context filtering — work together to give you precise, predictable outputs directly from your terminal.
Start small, iterate often, and build your prompt library as your confidence grows. The more intentional your approach, the more Gemini CLI delivers.